Going Greek

Lamb Burgers
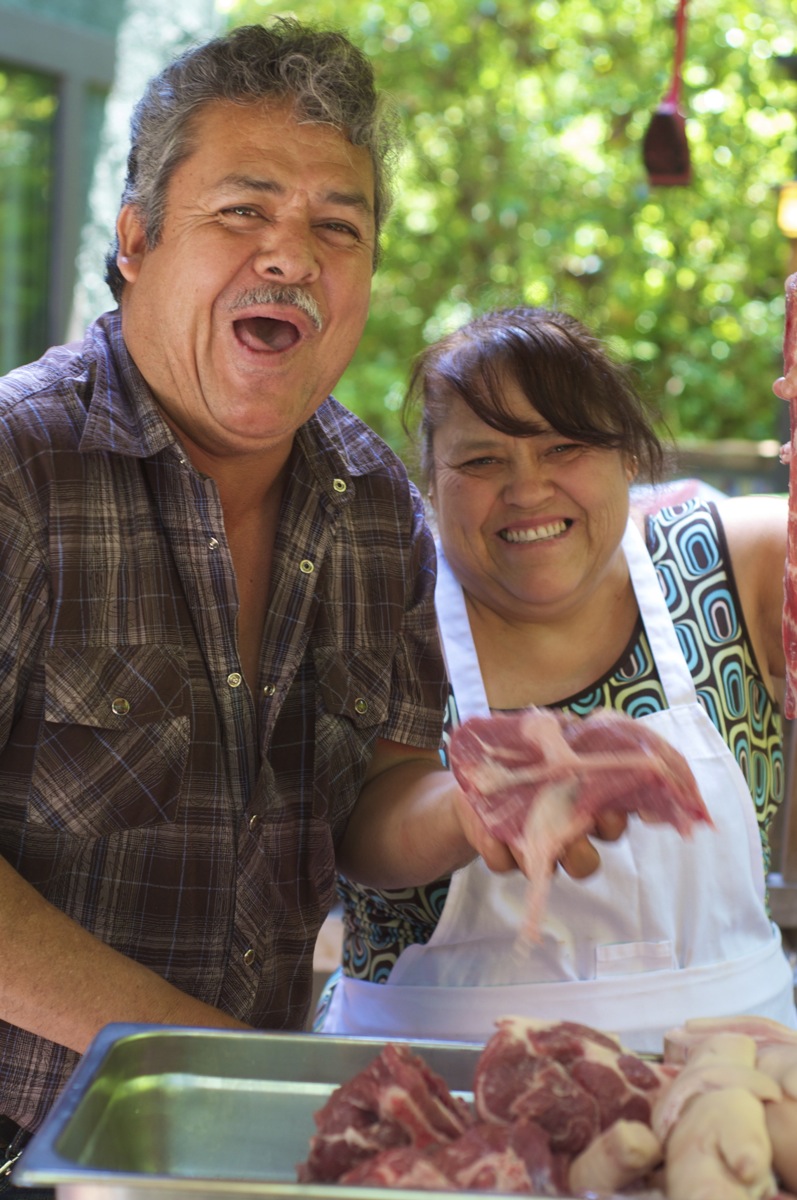
A few years ago our friends Bryan and Karen treated us to a Food & Wine event featuring several well-known and up-and-coming chefs. Michael Psilakis, known for his classic and creative Greek dishes, was one of the presenters, and I was thrilled when he announced we were all going to receive his cookbook “How To Roast a Lamb.” On a warm summer evening just a few weeks ago I got the itch to go “Greek” so out came the Psilakis book. Here’s what was cookin’ in my kitchen.

eggplant in the fire
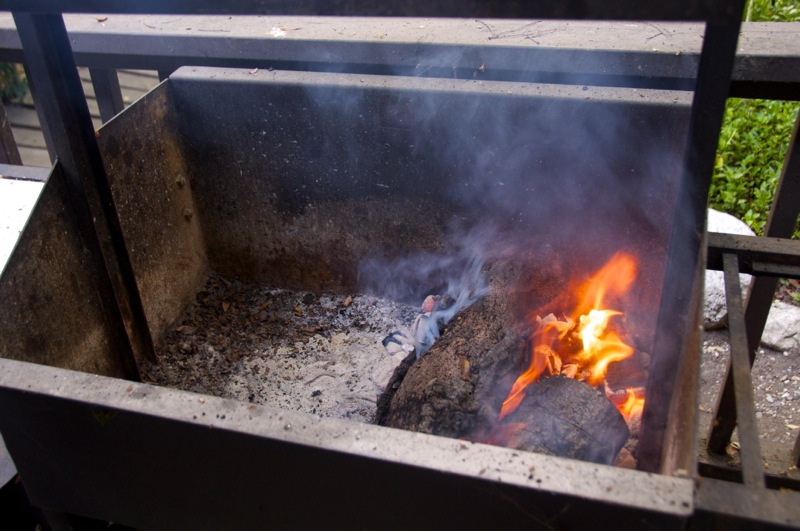
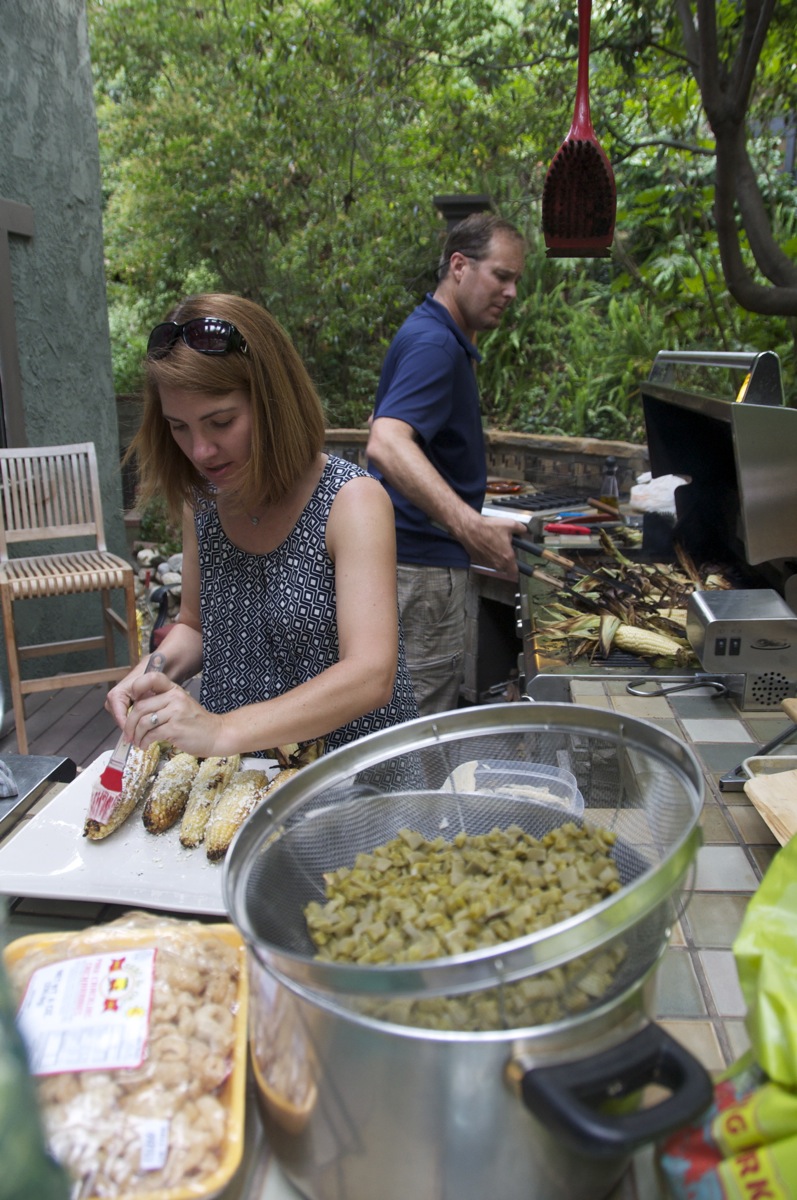
First step is to get your fire goCooking spray tricking (this can be said of many things in life!).  Here’s my trick .. scrunch up a few pieces of newspaper then spray with cooking spray, Santa Maria BBQ
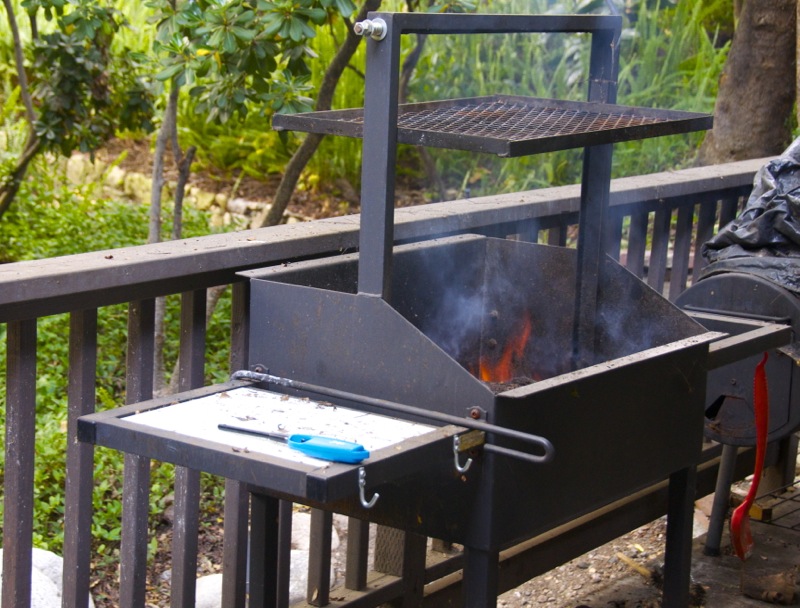
place under your chimney charcoal lighter, fill the chimney with briquettes, and light. The small amount of oil will keep the fire going. When your briquettes are starting to char on the edges, it’s time to dump ‘em into your grill. When the coals are nice and hot, throw a piece of oak into the fire – the oak burns long and hot.babaganoush

Babaganoush
2 large eggplants
2 onions
1 lemon, juiced
2/3 cup tahini ( sesame seed paste, available in the international aisle at the supermarket)
1/2 cup minced fresh parsley leaves
Kosher salt and freshly ground black pepper
Pita chips, for dipping

This is so much fun to make in a fire! Toss the onions and eggplants right into your coals, and char ‘em in the fire. It’s important to keep turning and rotating them so they roast evenly. The eggplants will take about 20 minutes to get nice and soft, onions at least 30-40 minutes. When they’re done, remove from the fire and place in a colander over another bowl (or in the sicharred eggplant
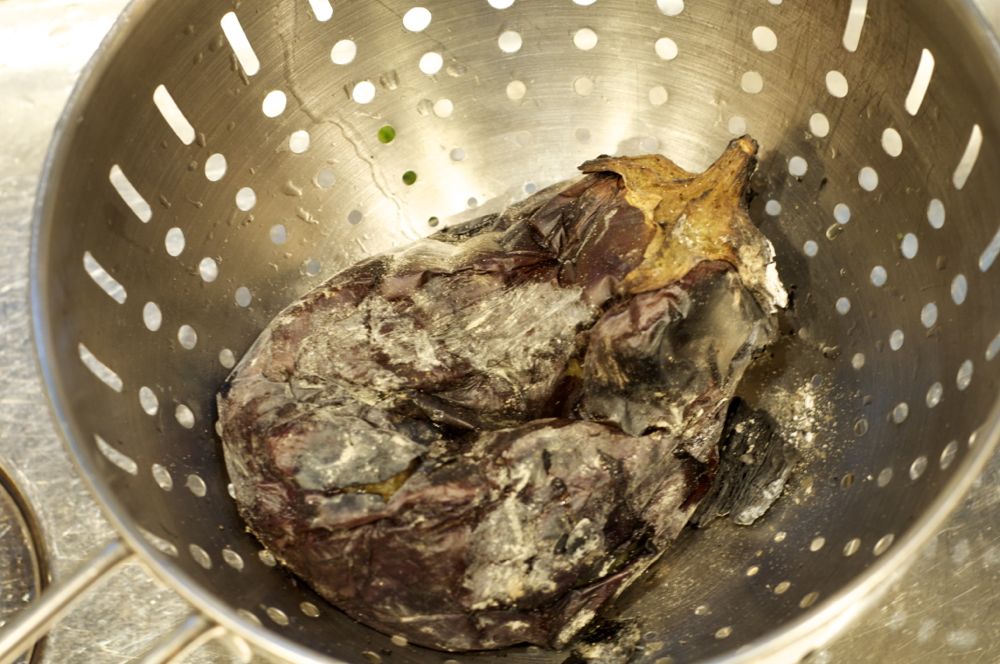
nk). Don’t skip this step – really improves the consistency of the dip. Once the eggplants and onions are cool enough to touch, carefully peel the charred skin off (my friend Deborah suggested leaving a bit of the char so I tried it – definitely added more smoky flavor!). Put in your food processor and pulse with the lemon juice, tahini, parsley, salt & pepper. Whisk together and taste for seasoning. Feel free to add more lemon juice, more salt and pepper .. it will vary depending on your eggplant.
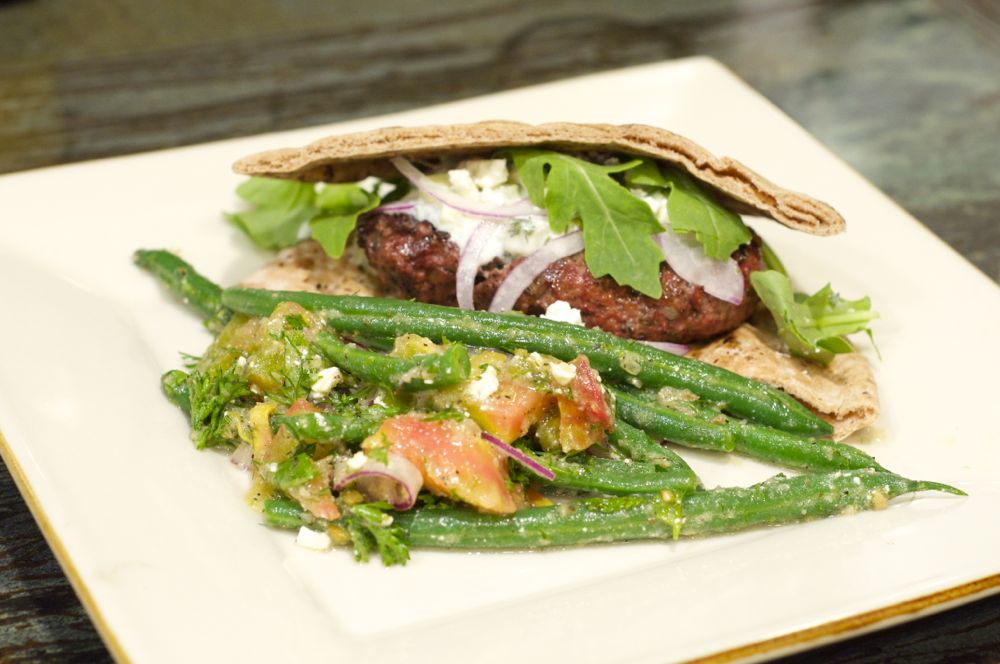
babaganoush

Lamb Burgers
1 pound ground lambground lamb
2 slices white bread, crusts removed, cubed
3 tablespoons milk
diced onions
fresh herbs: parsley, mint, dill
salt & pepper to taste
tsatziki sauce (recipe to follow)

Pour milk into small bowl, add bread cubes and mash with a spoon. Mix lamb burgerslamb, milk/bread mixture, diced onions, fresh herbs and salt & pepper together with your hands. Do not overmix. Shape into patties (I form them to fit perfectly into a half pita) then press your thumb into the center to prevent burgers fropattiesm puffing up on the grill. Grill burgers over a wood fire, then tuck into a pita and top with tsaziki sauce, thinly sliced red onions and arugula.

grilling the burgers


Tsatziki
Psilakis says “this is the one sauce you must make. It’s a classic and very easy to prepare, but be sure you use only a superior quality Greek yogurt or labne spread. It makes all the difference.”

1 English cucumber, peeled
10 cloves garlic, smashed and finely chopped
1 cup distilled white vinegar
4 shallots, thickly sliced
1 cup small, picked sprigs dill
2 1/2 cups strained or Greek yogurt, or labne
2 tablespoons extra-virgin olive oil
2 tablespoons fresh lemon juice
Kosher salt and cracked black pepper

Quarter the cucumber lengthwise and trim off the triangular wedge of seeds. Cut the cucumber into a very small, even dice. Transfer to a mixing bowl.

In a food processor, combine the garlic, vinegar, shallots and dill. Pulse until finely chopped but not pureed. Add the mixture to the cucumbers; add the yogurt. Fold together with a rubber spatula, adding the olive oil and lemon juice. Season liberally with kosher salt and pepper, starting off with 1 tablespoon salt. Taste for seasoning. You can store Tsatziki in a covered, clean jar in the refrigerator for up to 1 week.

green beans

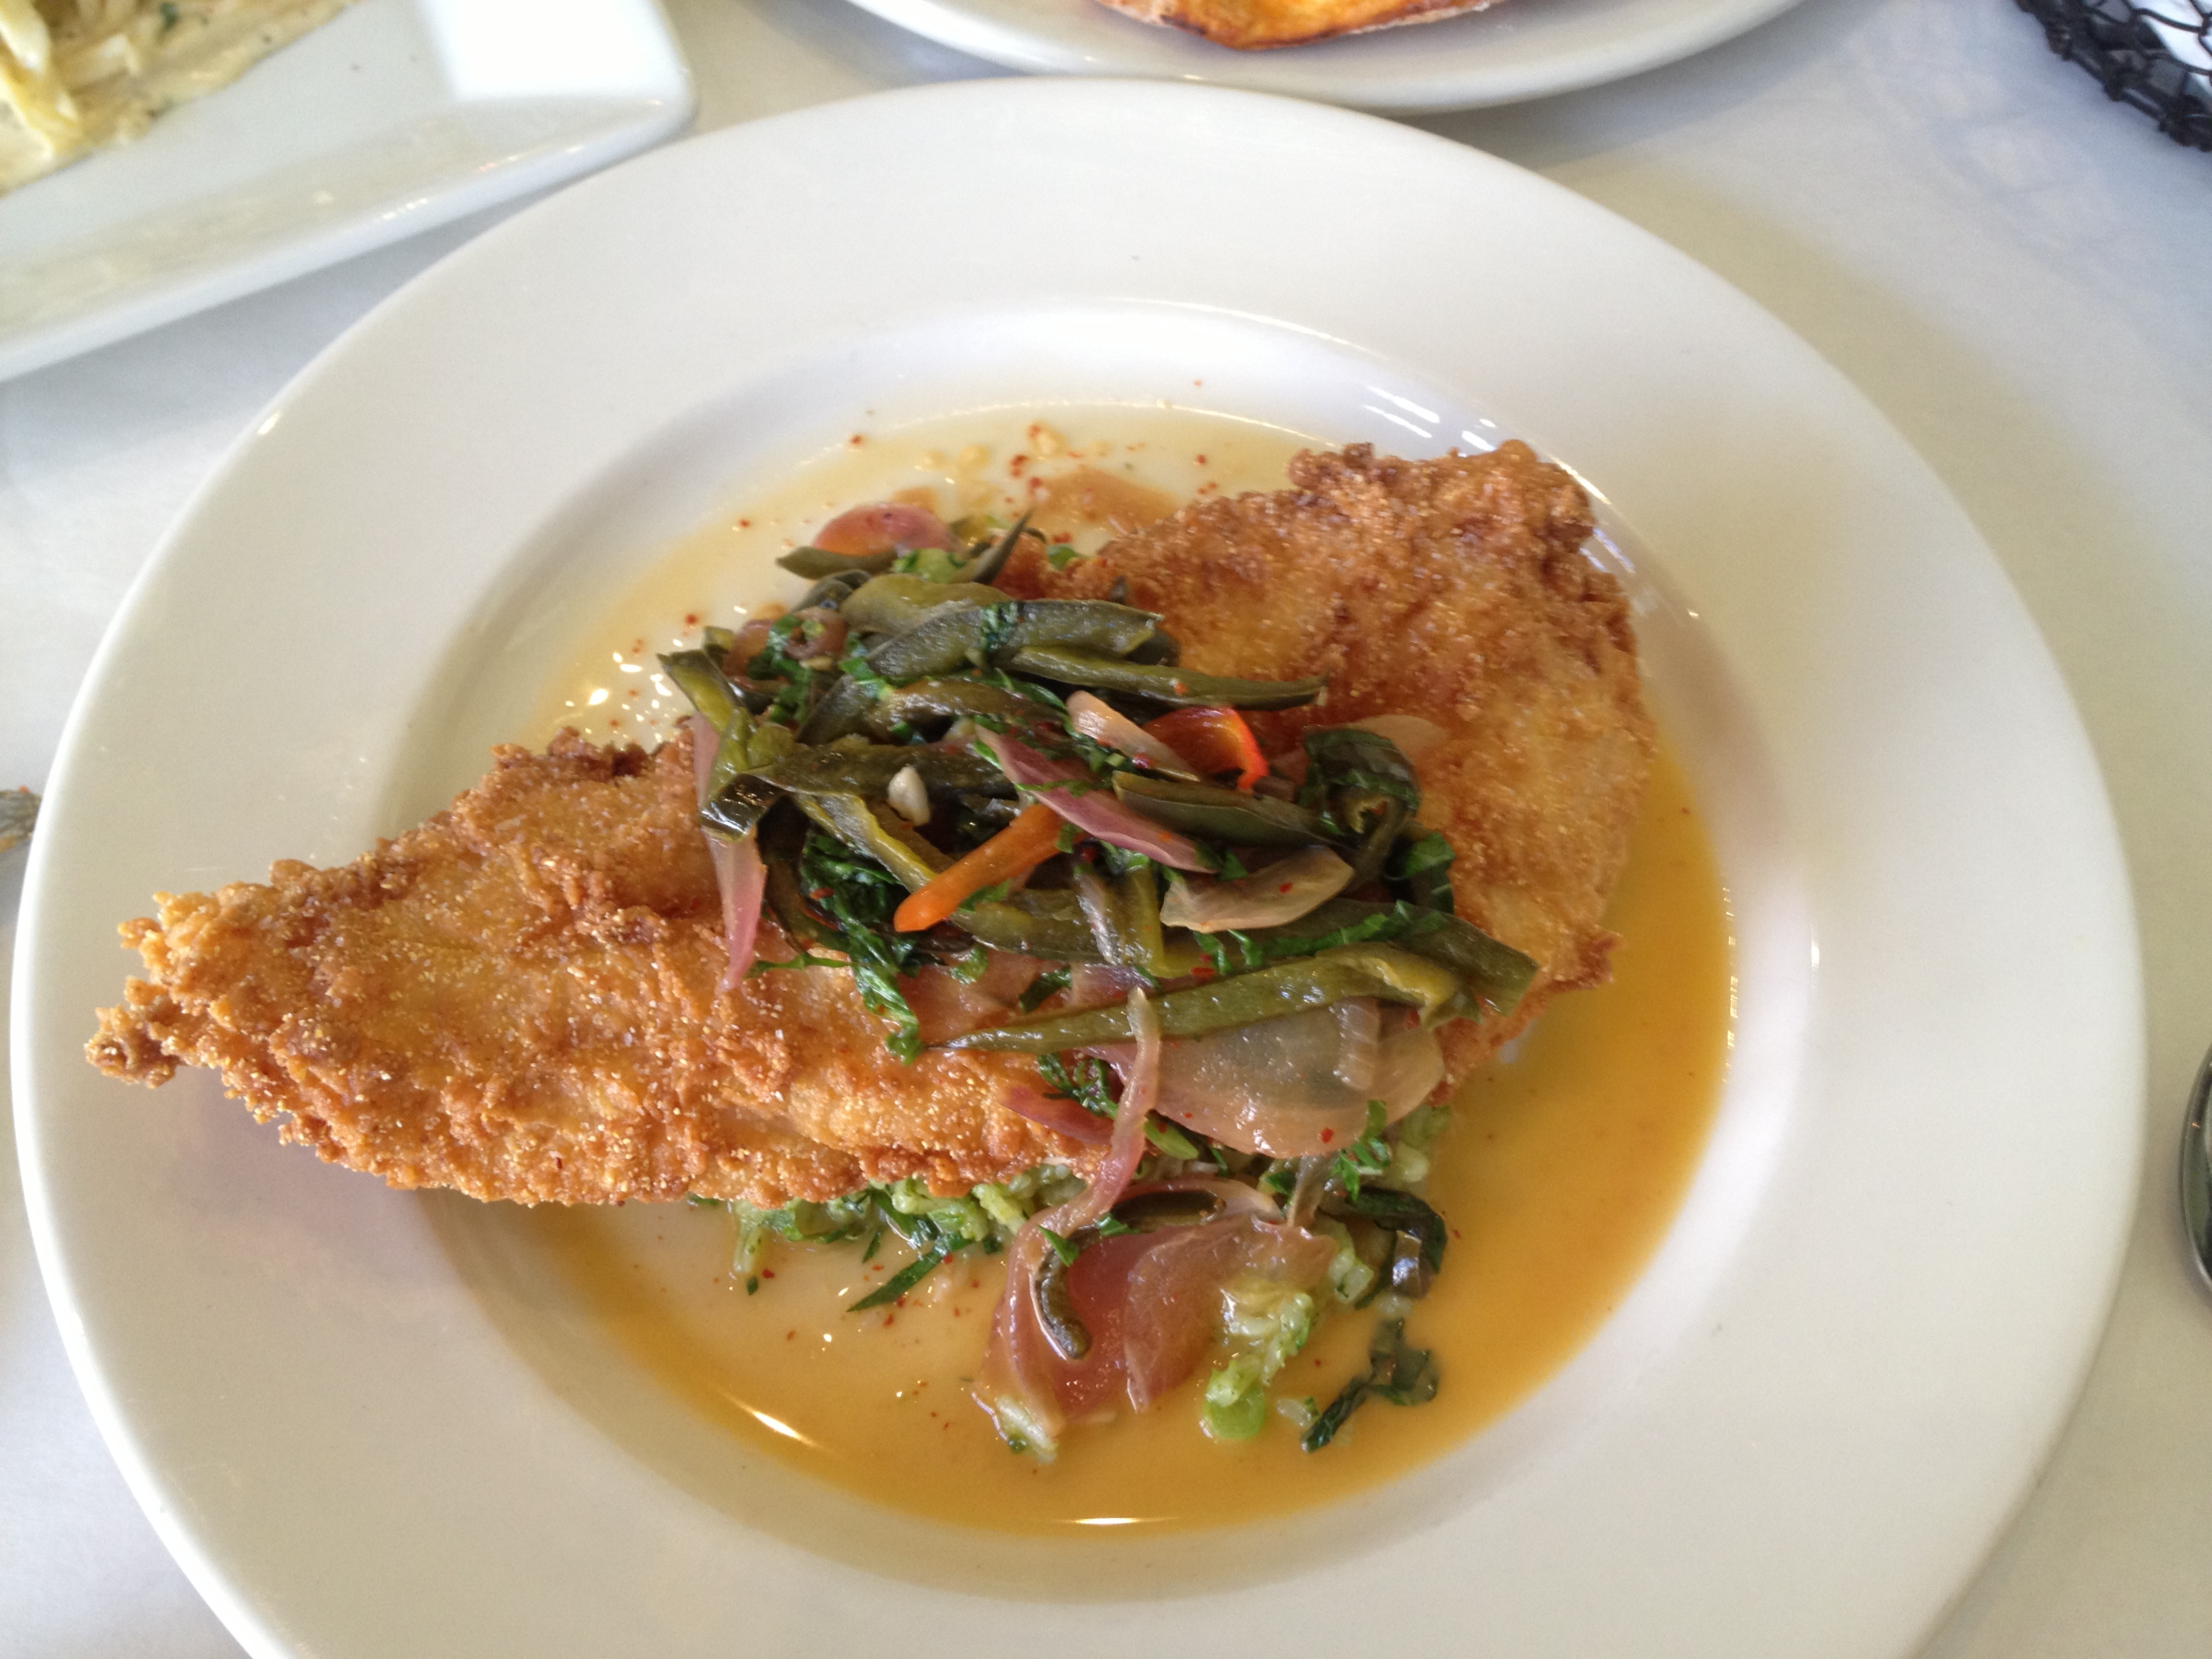
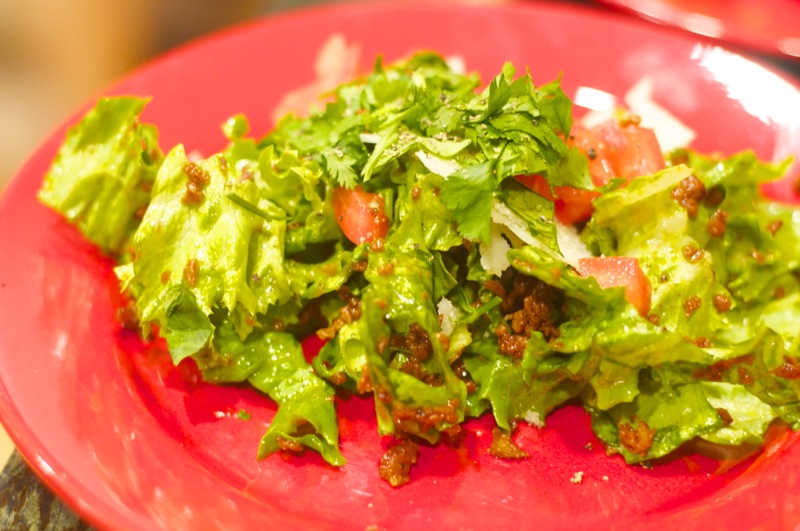
Tomato & String Bean Salad
This is one of my favorite salads .. so very fresh and tons of flavor.

shallots
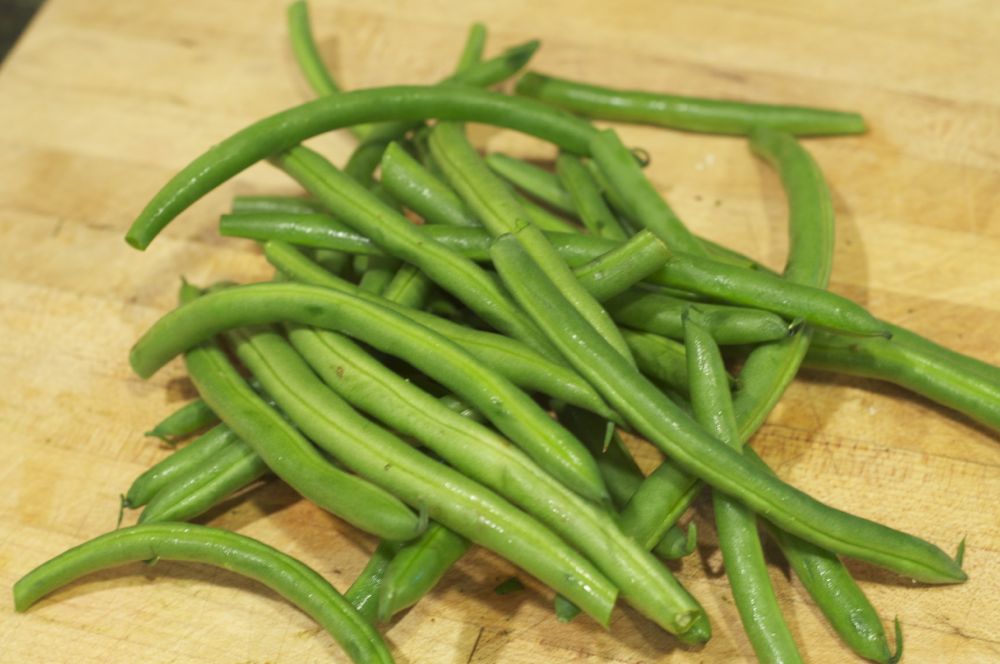
1/4 pound green beans, ends trimmed
1/4 pound yellow wax beans, ends trimmed
1/3 cup Red Wine and Feta Vinaigrette (recipe to follow)
2 tablespoons crumbled feta cheese
4 vine-ripe tomatoes, preferably heirloom, cut into rough wedges
1 teaspoon dry Greek oreganoherbs
1/2 small red onion, thinly sliced and separated into rings
6 small sprigs parsley, torn
6 small sprigs dill, torn
16 leaves fresh mint, torn
Kosher salt and coarsely cracked pepper

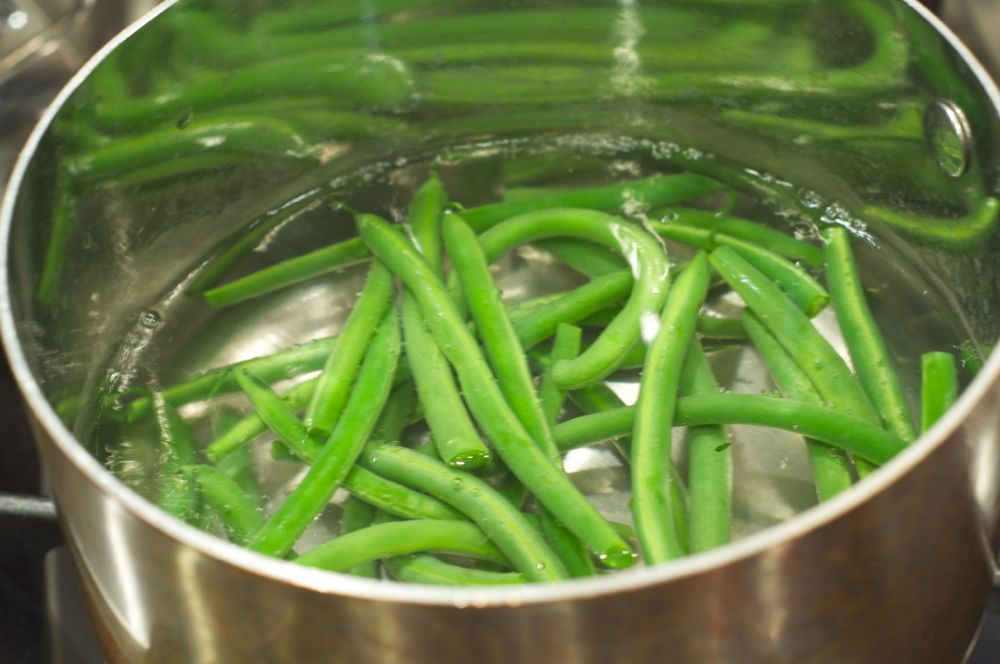
Prepare an ice bath and bring a pot of salted water to a boil. Blanch the beans until tender but still snappy, about 3 minutes, then shock them in the ice bath. Drain well and dry on a clean towel.heirloom tomato

blanching beansIn a bowl combine the beans, vinaigrette, feta, tomatoes, oregano, red onion, and torn herbs. Toss well with clean hands. Taste and adjust the seasoning with salt and pepper.

Red Wine & Feta Vinaigrette

1/2 cup red wine vinegar
1 small onion, sliced and grilled
6 basil leaves
1 teaspoon fresh thyme
1/4 cup crumbled feta cheese
2 tablespoons Dijon mustard
6 cloves garlic, smashed
2 shallots, thickly slicedviniagrette
2 tablespoons dry Green oregano
1 tablespoon kosher salt
1 tablespoon coarsely cracked black pepper
3/4 cup extra-virgin olive oil

grilling onionsIf you’re able, take the time to grill the onion for this vinaigrette. Slice into 1/2″ rings, drizzle with oil, and char on the grill until soft.

In a food processor, combine all ingredients except olive oil. With the motor running, drizzle in the olive oil until smooth. Taste, and if needed, season with more salt and pepper.viniagrette


Cinco de Mayo Bobby Flay style

Queso FundidoLast weekend my sister Nila came to town, and since she lives all the way in Kansas, we don’t get to see each other often enough. The weekend was filled with all things L.A. .. Getty Museum, Santa Monica Beach, happy hour at Drago Centro, The Last Book Store, but I’d have to say my favorite event was spending an evening in the kitchen together, making a Bobby Flay feast for an intimate dinner party.

Me and my sisNow if you’ve ever perused Bobby’s Mesa Grill cookbook, you can probably understand how quickly the time flies by when preparing his dishes.  And while it is true that many of his dishes do take some time to prep, it’s worth it!  I simply love the fresh tastes of his contemporary Southwestern menus.


So here’s what was cookin’ in my kitchen ..

Frisee SaladFrisee Salad with Chorizo and Roasted Garlic Vinaigrette
serves 4

1 tablespoon olive oil
12 ounces Spanish chorizo sausage, sliced 1/4″ thick (I substituted the soy chorizo from Trader Joe’s .. YUM!)
8 ounces frisee, torn into bite-sized pieces
Roasted Garlic Vinaigrette (recipe follows)
Kosher salt and freshly ground black pepper
3 plum tomatoes, quartered
Thinly shaved Asiago cheese or Parmigiano-Reggiano, for garnish
Chopped fresh cilantro, for garnish

Soy Chorizo1. Heat the oil in a large skillet over high heat. Add the sausage and cook until lightly browned on both sides, 4-5 minutes. Remove with a slotted spoon to a plate lined with paper towels. (If you make it with TJ’s soy chorizo, it’s pre-cooked so remove the casing and crumble in a skillet to warm through.)

2. Place the frisee in a large bowl, add 1/4 cup of the vinaigrette, season with salt and pepper, and toss to coat. Place the tomatoes in a bowl, add a few tablespoons of the dressing season with salt and pepper, and toss to coat.

3. Divide the frisee among 4 large plates, arrange tomato quarters and slices of the chorizo around the perimeter of each plate. Garnish with shaved cheese and chopped cilantro, and drizzle with the remaining vinaigrette.

Roasted garlicRoasted Garlic Vinaigrette
Makes about 1 cup
8 cloves roasted garlic, peeled (instructions to follow)
3 tablespoons red wine vinegar
1 tablespoon chopped red onion
1 tablespoon honeyRoasted Garlic
1 tablespoon fresh lime juice
Kosher salt and freshly ground black pepper
1/2 cup olive oil

Combine the garlic, vinegar, onion, honey, lime juice, and salt and pepper to taste in a blender and blend until smooth. With the motor running, slowly add the oil and blend until emulsified. This can be made up to 1 day ahead and refrigerated.

Roasting garlic: Preheat the oven to 300 degrees. Separate the cloves of a head of garlic, but do not peel. Drizzle the cloves with olive oil and season with salt and pepper. Wrap the garlic securely in aluminum foil and place on a baking sheet. Roast in the oven for 45 minutes to 1 hour, until very soft. Squeeze the pulp from the skins, discarding the skins. Roasted garlic will keep covered and stored in the refrigerator for up to 5 days.

Queso FundidoQueso Fundido with Roasted Poblano Vinaigrette
Serves 4

Bobby Flay says this is one of the all-time most requested recipes at Mesa Grill.  He says “what’s not to like about melted, bubbly cheese topped with a green chile vinaigrette?” It’s pretty easy to make, so give it a try!

Monterey jack cheese1 tablespoon unsalted butter
1 tablespoon all-purpose flour
1 cup whole milk
3 cups grated Monterey Jack cheese (12 ounces)
1/4 teaspoon kosher salt
1/8 teaspoon freshly ground black pepper
8 ounces fresh goat cheese, cut into 8 slices
Roasted Poblano Vinaigrette (recipe follows)
2 tablespoons chopped fresh cilantro
Tortilla chips

1. Preheat the broiler.

2. Melt the butter in a medium saucepan over medium heat. Whisk in the flour and cook for 1 minute. Whisk int he milk and cook until slightly thickened. Remove from the heat and stir in the grated cheese; season with salt and pepper.

3. Scrape the mixture into an 8-inch cast-iron pan and place the slices of goat cheese over the top. Put the pan under the broiler and broil until the goat cheese is golden brown on top. Remove from the oven, drizzle with the poblano vinaigrette or spoon it over the top, and sprinkle with the cilantro. Serve with chips for dipping.

Blending the vinaigretteRoasted Poblano Vinaigrette
Makes about 3/4 cup

2 poblano chiles, roasted, peeled, seeded, and chopped (instructions to follow)
1 tablespoon red wine vinegar
1 clove garlic, chopped
1 teaspoon honey
1/4 cup canola oil
Kosher salt and freshly ground black pepper

Combine the poblanos, 2 tablespoons cold water, vinegar, garlic, honey, canola oil, and salt and pepper in a blender or food processor and puree until smooth. This can be made up to 8 hours in advance and refrigerated.  (BTW, if your market doesn’t have poblanos, you can certainly use Anaheim chiles.)

Roasting ChilesAnaheim chilesRoasting Peppers and Chiles
Pre-heat your broiler. Cut peppers or chiles lengthwise; remove seeds and stems. Place peppers, skin side up, on a foil-lined baking sheet. Slide into the oven and broil until charred nicely (keep a close eye on your oven – this won’t take long!). Remove from the oven and place peppers in Roasting chiles
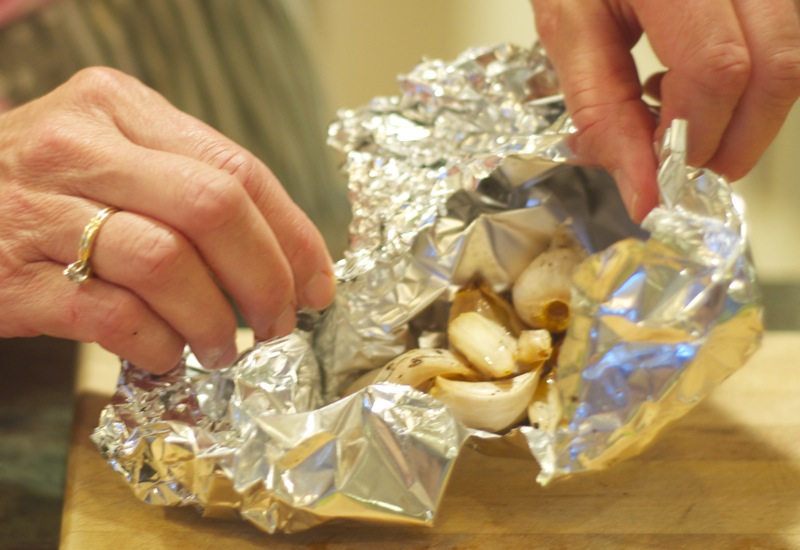
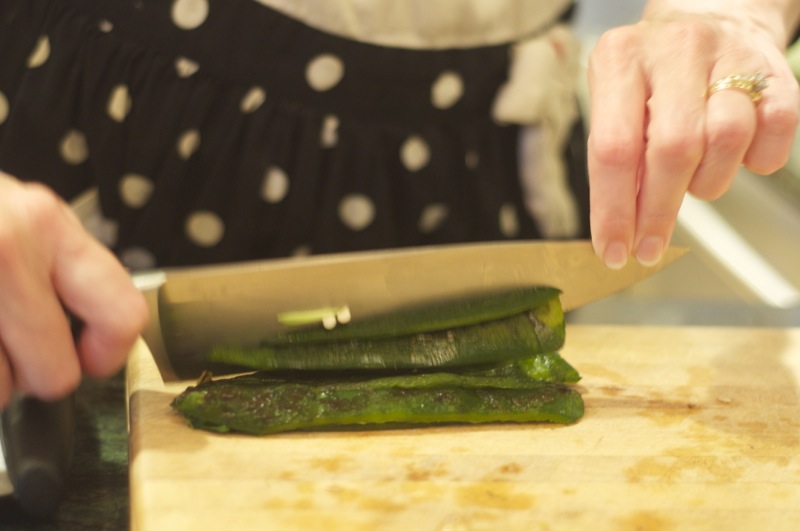
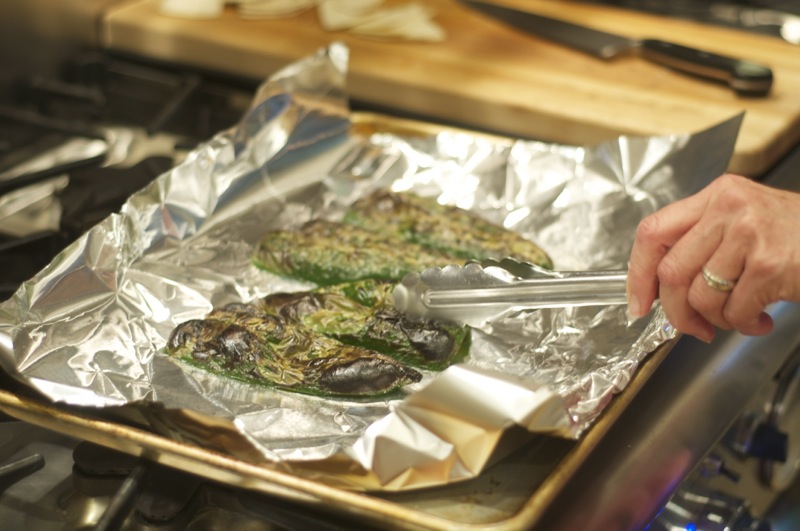
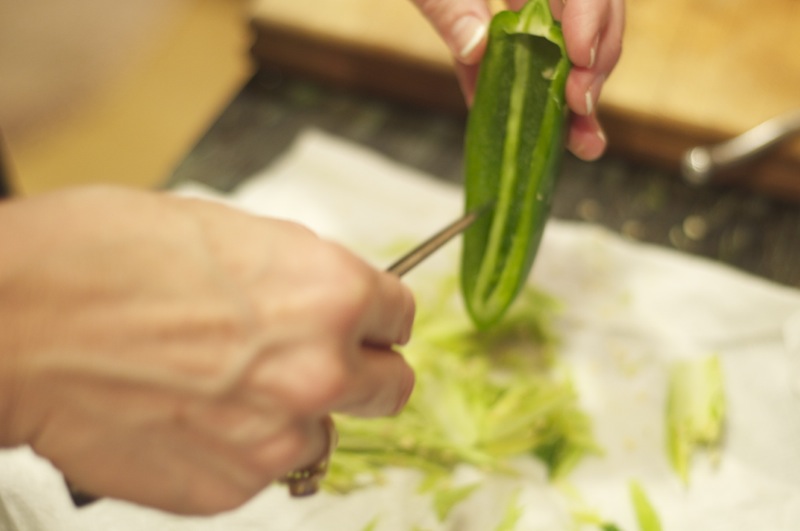
a bowl, cover with plastic wrap, and let sit for about 15 minutes to allow the skin to loosen, then peel. Roasted peppers and chiles can be covered and stored for up to 5 days in the refrigerator.


Tortilla ChipsTortilla Chips
I’m fortunate to live in a diverse city, with access to all sorts of ethnic markets.  One of my favorites is Baja Ranch, just up the street.  They make the BEST corn tortillas, fresh every day.  I like to make my own tortilla chips in order to cut down on the fat and sodium.  Cut the tortillas into chip-sized wedges; spray a half-size cooking sheet with cooking spray, then lay the tortillas in a single layer.  Spray the tops with a bit more cooking spray, then sprinkle with kosher sale. Bake in a 375 degree oven until crisp and golden, about 12-14 minutes.

Wild Mushroom QuesadillaWild Mushroom Quesadillas with Red Chile Jack Cheese and White Truffle Oil
Serves 4
Not only is this dish super tasty, it’s beautiful, too!

1/4 cup olive oil
1/2 small red onion, finely diced
2 cloves garlic, finely diced
1 1/2 pounds assorted mushrooms, such as cremini, shiitake and portobello, chopped
Kosher salt and freshly ground black pepper
2 ancho chiles, soaked (instructions to follow)
2 cups shredded Monterey JAncho chiles
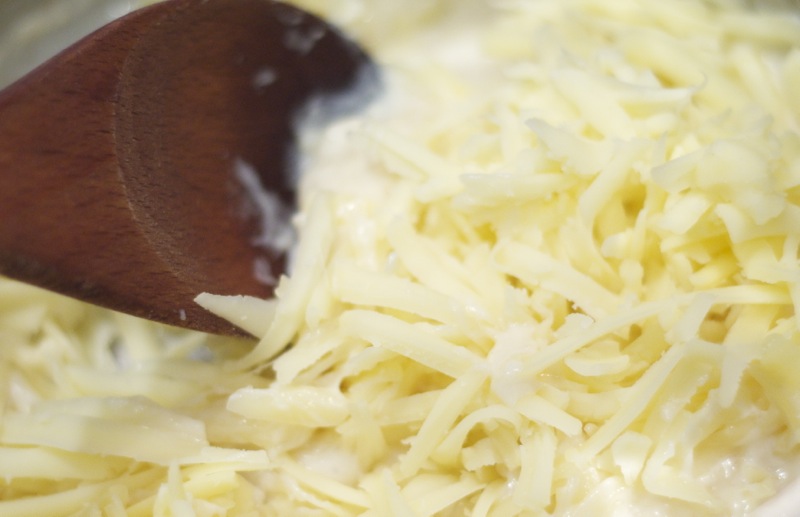
ack cheese (8 ounces)
12 (6-inch) flour tortillas (I used corn)
1/4 cup grated cotija cheese or Romano cheese (1 ounce)
4 teaspoons white truffle oil

1. Preheat the oven to 425 degrees.

2. Heat 2 tablespoons of the olive oil in a large saute pan over medium-high heat. Add the onion and cook until soft, 3-4 minutes. Add the garlic and cook for 30 seconds more. Add the mushrooms, season with salt and pepper, and cook until golden brown and all of their liquid has evaporated, 8-10 minutes.

Wild Mushrooms3. Remove the anchos from their soaking liquid, reserving 1/4 cup of the liquid. Stem, seed, and finely chop and place in a bowl. Add the reserved soaking liquid and the cheese, and mix to combine.

4. Place 8 of the tortillas on a flat work surface. Divide the cheese mixture and mushrooms among the tortillas and season with salt and pepper. Stack the tortillas to make four 2-layer tortillas and cover each with one of the remaining tortillas. Brush the tops with the remaining 2 tablespoons oil and sprinkle with the cotija cheese.

Quesadillas5. Transfer to a baking sheet. Bake for 8-10 minutes, until lightly golden brown and the cheese has melted.

6. Cut into quarters and drizzle with the truffle oil.

Soaking chiles: Place dried chiles in a bowl. Pour boiling water over the top to completely immerse the chiles. Let soak for about 30 minutes, or until soft. Remove the chiles from the water and remove the stems and seeds, reserving the water.

Jalapeno PoppersJalapeno Poppers
One of my favorite appetizers is jalapeno poppers .. you may remember reading about them in a prior post.  JalapenosPoppers on the grill
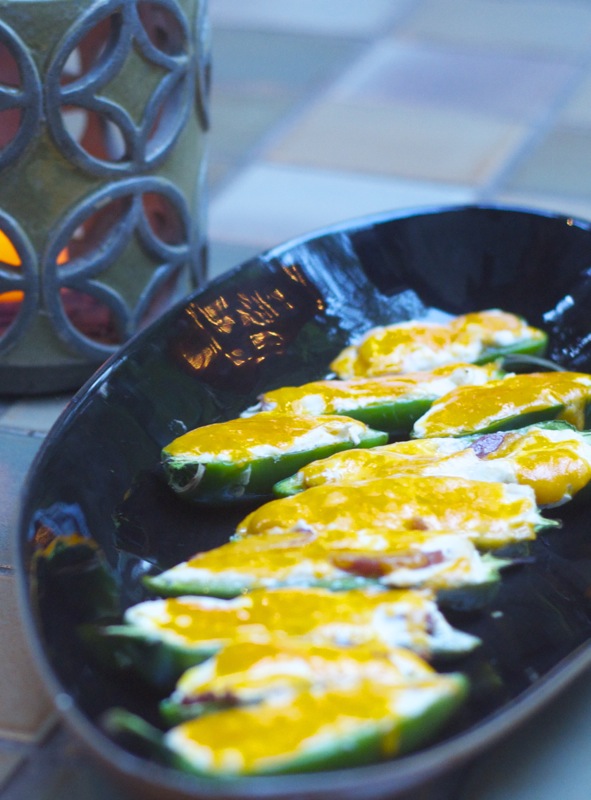
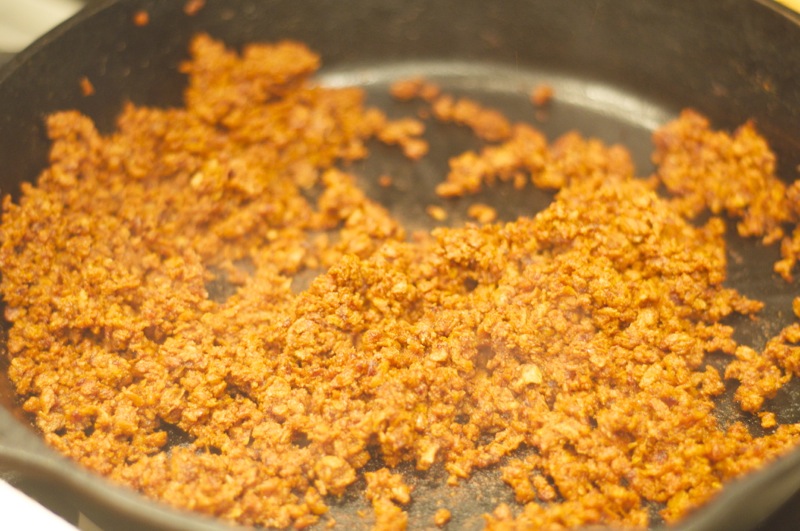
Since I had a bit of leftover chorizo, I thought it’d be fun to replace the salami in with the soy chorizo, and YUM!!! .. will definitely be making this again!  Check out this link to my prior post for the “specifics.”


Cooking with FireCoffee-Rubbed Filets Mignons and Rib-Eyes
Searing over a wood fire is one of my favorite ways to prepare a steak, and last year we picked up a Santa Maria style barbeque which is the perfect tool for making a perfect steak. We rubbed our steaks with BBQ Beef Coffee Cure (recipe from Tim Byres cookbook called Smoke: New Firewood Cooking) and the hubby grilled our steaks to perfection!

Santa Maria BBQBBQ Beef Coffee Cure
Makes 2 1/2 cups
Byres says “I encourage rolling up your sleeves and using your hands to mix these spices – it helps to capture a feeling of nostalgia for cooking” .. and I couldn’t agree more!

1/3 cup finely ground dark roast coffee
1/3 cup dark chili powder
1/3 cup smoked paprika
1/2 cup kosher salt
2/3 cup packed dark brown sugar
3 tablespoons sugar
2 tablespoons granulated garlic
1 tablespoon ground cumin
1 teaspoon cayenne pepper

Mix all ingredients in a medium bowl, using your hands to break up any clumps. Do not refrigerate. Store in an airtight container, in a cool, dry place, such as your cupboard.

50 Best Cookbooks of All Time

A16 cookbookA few years ago The Guardian published a listing of the 50 best cookbooks of all time, many of which were James Beard award winners, so of course I was intrigued. It’s a bit embarrassing, I admit .. but my bedtime reading is usually in a cookbook or the latest Food & Wine magazine. I’ve acquired several of the cookbooks on the list, and one of my favorites is A16 Food + Wine.

gnocchiWe traveled to San Francisco with our BFFs a few days before Christmas, and were fortunate enough to be able to book a table at the A16 restaurant. Having enjoyed several recipes from the cookbook, I was super excited to dine there. Our dinner and dining experience was fabulous! All 4 of us ordered different dishes and rather than sharing a bottle of wine, we asked our server for her pairing recommendations. pizzaShe was extremely knowledgeable, and knew exactly which wines to select (and she didn’t just choose the expensive ones!). Check out these photos of my gnocchi and Curt’s pizza. YUM! What I love about their dishes is the simplicity and use of fresh ingredients.

When we returned home from Christmas travels, I was anxious to crack open my cookbook again and made this pasta dish for New Year’s Day.

BucatiniBucatini with Oven-Dried Tomatoes, Garlic, Chiles and Bottarga
Pair with Cagnulari (Sardinia) Serves 4 as a main course, or 6 as a first course

Kosher salt
Extra virgin olive oil
2 cloves garlic, smashed with the side of a knife
1/4 teaspoon dried chile flakes
2 cups oven-dried tomatoes (recipe to follow), each tomato cut into thirds
12 ounces bucatini
1-ounce piece bottarga for grating (sadly my go-to Italian market, Claros, was out of bottarga so I settled for grating parmigiano reggiano cheese on top)

bucatini recipeBring a large pot of salted water to a boil for the pasta.

Meanwhile, heat 1/4 cup olive oil in a large saute pan over medium-low heat. Add the garlic and chile flakes and sweat, stirring occasionally, for about 3 minutes, or until the garlic has softened. Stir in the tomatoes and cook for about 5 minutes, or until the tomatoes have plumped up. Taste saucefor seasoning and add salt if needed, keeping in mind that the tomatoes are seasoned and the bottarga is salty, so you need to proceed cautiously.

pastaAdd the pasta to the boiling water and cook for about 1 minute less than specified on the package. Drain the pasta, reserving about 1 cup of the cooking water, and return the pasta to the large pot over medium heat. Add the sauce to the pasta along with a couple of tablespoons of olive oil and toss well, adding some of the reserved pasta water if needed to loose the sauce. If the sauce is too loose, turn the heat up to medium-high and cook down the sauce with the pasta. It should be loose enough to barely pool at the bottom of the pot, but not too watery. Taste for seasoning, adding more salt if needed.

Serve the pasta in a warmed large bowl, family style. Grate the bottarga over the top to finish and serve immediately.

dried tomatoesOven-Dried Tomatoes
Makes 2 cups

1 1/2 pounds kosher salt
15 San Marzano tomatoes (if you can’t find San Marzanos, use ripe Roma tomatoes in their place)
About 1/2 cup extra virgin olive oil

Preheat the oven to 200 degrees. Spread the sale on a 13-by-18-inch rimmed baking sheet, creating a layer 1/2 inch thick. Core the tomatoes and halve them lengthwise. Arrange the halves, skin side down, in rows on the salt layer. Bake for 6 hours, or until the tomatoes are completely dried and look like sun-dried tomatoes. (If you have a convection oven, turn the fan on; the tomatoes should be dry in about 3 hours.)

Remove the tomatoes from the sale (the salt can be reused for another batch) and pack them into a container with a tight-fitting lid. Pour in olive oil, cover, and store in the refrigerator for up to 1 week.

Turkey Pot Pie

Turkey Pot PieThere are certain cookbooks sitting on my bookcase that look like they were rescued from the Titanic .. you probably have a few like this .. tattered covers, numerous bookmarks, crumpled, stained pages ..

The Complete Cooking Light Cookbook is that book in my collection. I have several favorite recipes in the book, but one that tops my list is Chicken Pot Pie. Sadly, I overcooked yesterday’s Thanksgiving turkey a tad, so this was my “day after” go-to recipe.

Thanksgiving TableAfter hosting a houseful of guests yesterday, I was ready for some serious comfort food on this cloudy, rainy day. I’ve made this dish several times, with both chicken and turkey, and it is definitely one of my favorites.

Fresh veggiesIf you’re using leftover turkey or chicken and have stock on hand, just cut meat into bite-size pieces and skip steps 1-3.

Chicken Pot Pie
9 cups water
1 tablespoon black peppercorns
2 1/2 pounds chicken pieces, skinned
3 celery stalks, each cut into 4 pieces
1 small onion, quartered
1 bay leaf
1 1/2 cups diced unpeeled round red potato
1/2 cup chopped celery
1/2 cup chopped red bell pepper
1 garlic clove, minced
3/4 cup thinly sliced carrot
1/2 cup chopped leak (about 1 small)
1 cup sliced fresh mushrooms
1/2 cup frozen green peas
6 tablespoons flour
1 teaspoon salt
1 teaspoon black pepper
1 cup 1% low-fat milk
Cooking spray
Biscuit Topping (recipe below)

Garlic1. Combine first 6 ingredients in an 8-quart Dutch oven or stock pot; bring to a boil. Reduce heat to medium and cook, uncovered, for 1 hour. Remove from heat.

2. Remove chicken pieces from broth. Place chicken in a large bowl and chill for 15 minutes. Strain broth through a cheesecloth-lined colander into a bowl; discard solids. Set aside 4 1/2 cups broth; reserve remaining broth for another use.

3. Remove chicken from bones; cut meat into bite-size pieces.

4. Preheat oven to 400 degrees.

Veggies5. Bring 4 1/2 cups broth to a boil in a large saucepan over medium-high heat. Add potato, chopped celery, bell pepper and garlic; cover and cook 5 minutes. Add carrot and leek; cover and cook 3 minutes. Add mushrooms and peas; cover and cook 5 minutes or until vegetables are tender.

6. Combine flour, salt and pepper in a medium bowl. Add milk, stirring with a whisk; add to vegetable mixture. Cook over medium heat 3 minutes or until thickened and bubbly, stirring constantly. Remove from heat; add chicken.Stock with vegetables

7. Spoon into a 13 x 9-inch baking dish coated with cooking spray. Drop Biscuit Topping onto mixture to form 16 biscuits. Bake at 400 degrees for 30 minutes or until golden. Yield: 8 servings (serving size about 1 cup chicken mixture and 2 biscuits.)

Pot PieBiscuit Topping
2 cups flour
2 teaspoons baking powder
1/2 teaspoon salt
1/4 teaspoon sugar
1/8 teaspoon garlic powder
1 cup 1% low-fat milk
1 1/2 tablespoons butter, melted

Lightly spoon flour into dry measuring cups; level with a knife. Combine flour, baking powder, salt, sugar and garlic powder in a bowl. Stir in milk and margarine just until flour mixture is moistened. Yield: 16 biscuits.

Pot Pie

A walk down memory lane

Oyster StewGrowing up, I have vivid memories of my father making oyster soup. Surprisingly, out of a family of seven, it was just me and my dad who had any interest in oysters. My 7th grade mind remembers him pouring milk into a saucepan, adding about a half stick of butter, and when it came to a simmer, he would open up and pour in a few cans of oysters. Topped with a sprinkle of black pepper, was it ever good.

CatfishRecently I tagged along with my husband to the Christian Community Development Association conference, mainly because it was in New Orleans, and while in NOLA we were lucky enough to dine at Donald Link’s restaurant called Herbsaint. While on lunch break one day, we wandered into this restaurant (honestly, we were just too hot and tired to walk any further) and what a nice surprise! The photo above is of an amazing catfish dish that I enjoyed. We were all a bit surprised that the New Orleans small plates were larger than dishes we’ve been served at downtown L.A. restaurants.

Sister BettyAnother draw for me to tag along on this trip had to do with friends I made after Katrina. Our church had partnered with Christ Church in New Orleans East to re-build 11 houses, and after spending a couple of weeks tiling bathrooms and fireplaces several years ago, I found myself endeared with these wonderful people.

My friend Nancy surprised us a shortly after our return with a cookbook authored by Link called Real Cajun. Looking for inspiration for “what to make for dinner” this weekend, I stumbled across Link’s recipe for an oyster stew, and (oh my goodness!) were we ever in for a treat.

Chopping baconIn the cookbook, Link explained the humble beginnings of this recipe. The first Friday that his restaurant Herbsaint was open after Hurricane Katrina, of the 40 people whom he ordinarily employed on a weekend night, only 7 could make it to the restaurant. His friend John Harris, chef at Lillette restaurant, called and offered to help in any way that he could. He and 2 of his waiters came to work with Link that night. Link described the evening “we never expected to be so slammed just 5 weeks after the worst natural disaster in American history, but we were, and we were running out of food fast.”  Link asked John if he could create a new dish from his comparatively lean pantry, and he made this delicious stew in 30 minutes and the restaurant sold 25 orders in the second half of the night!

Smoked baconHerbsaint-Infused Oyster Stew with Smoked Bacon
Serves 6-8 as a main course, 8-12 as an appetizer

1 pint shucked oysters (about 24 oysters), drained and liquor reserved
3 ounces thick-sliced smoked bacon, cut into 1/4″ cubes
4 tablespoons (1/2 stick) butter
1 small onion, chopped into 1/4″ dice
1 bunch scallions, sliced
2 celery stocks, chopped into 1/4″ dice
1 cup chopped (1/4″ dice) fennel bulb
2 garlic cloves, finely minced
5 bay leaves
1/2 teaspoon salt
1/4 teaspoon cayenne pepper
1 teaspoon ground black pepper
1 teaspoon chopped fresh thyme
1/3 cup flour
1 small russet potato, peeled and diced
2 cups heavy cream
2 tablespoons Herbsaint or other anise-flavored liqueur (like Pernod)

Shucked oystersPick through the oysters to ensure they are clean of grit or shell (or buy them already shucked at Whole Foods, like I did!). Place half the oysters in a food processor and puree until smooth (I used my immersion blender which worked perfectly). Transfer the puree to a bowl and refrigerate along with the remaining whole oysters until needed.

Smoked baconHeat the bacon in a large pot or Dutch oven over low heat until its fat is rendered and the bacon is just starting to sizzle 2-3 minutes. Add 1 tablespoon of butter and the onion, scallions, celery, fennel, garlic, bay leaves, salt, cayenne, pepper and thyme. Cook slowly, stirring frequently, until they are tender, about 10 minutes. You want to “sweat” the vegetables so they soften and release their juices without browning them.

Bacon & butterAdd 2 more tablespoons of butter to the pot. As soon as the butter melts, add the flour and stir until ingredients are evenly coated. Add 2 cups reserved oyster liquor (I used my fish stock), the potato, and pureed oysters and bring to a simmer. Simmer gently for 15 minutes. Add 1 cup of cream and simmer for 5 more minutes.

PotatoesTo finish the stew, add the last cup of cream, remaining tablespoon of butter, Herbsaint, and reserved whole oysters. Cook for 5 more minutes and serve.

Oyster stewNote: If you do not have enough oyster liquor from the pint of oysters, add fish stock, chicken broth, or water, as needed.

This stew is absolutely delicious served with warm, crusty bread, a simple green salad, and a glass of Sancerre wine. All I can say is, “AMAZING!”

Decadence: excessive indulgence in pleasure or luxury

Creme Brulee French ToastI wish I could have had the opportunity to be Susan Campoy’s sous chef. Seriously! In 1985 she opened a restaurant called Julienne, and it’s definitely on my Top Ten list of places to dine. So, when I had the chance to cook breakfast for Curt’s co-workers, the Julienne’s cookbook was my first place to go.

Leslie the chefHow fortunate to have a fabulous sous chef to cook with! I bribed Leslie with a glass of pinot, and she graciously stepped in to assist.

Julienne’s Creme Brulee French Toast is the definition of decadent. I decided this just had to be on our menu.

French breadCreme Brulee French Toast with Creme Anglais and Fresh Fig Compote
Serves 8-12

CaramelCaramel:
1 cup packed dark brown sugar
1 cup (2 sticks) unsalted butter
1 tablespoon light corn syrup (I substituted real maple syrup)

Checking the caramelFrench Toast:
15 extra-large eggs
3 cups heavy cream
1 1/2 cups half-and-half
1/4 cup Grand Marnier or other orange liqueur
1 tablespoon vanilla extract
1 vanilla bean, split lengthwise
1 1 1/4-pound loaf French bread, cut into 3/4-inch-thick slices
Creme Anglaise (recipe follows)
Fresh Fig Compote (recipe follows)
Fresh raspberries, for garnish

To make the caramel: Whisk the brown sugar, butter and corn syrup in a heavy medium saucepan over medium heat until the ingredients are melted and well blended. Simmer until the sauce thickens and darkens, whisking occasionally, about 15 minutes. Pour the caramel into a 13x9x3″ baking dish and set aside to cool completely.

Caramelseparating eggsTo make the French toast: Whisk the eggs, cream, half-and-half, Grand Marnier and vanilla in a large bowl. Scrape the seeds from the vanilla bean into the custard. Reserve the bean for another use (perhaps ice cream??!!)vanilla beans

Arrange enough of the bread slices on top of the caramel to form a single layer, trimming the bread to fit if needed. Pour half of the custard over the bread and gently press the bread to submerge it in the custard.

seeds from vanilla beansArrange a second layer of bread slices on top of the first layer, then pour the remaining custard over, pressing again to submerge the bread in the custard. Set aside for 1 hour to allow the bread to absorb the custard.

French breadDo-ahead: The French toast can be made up to this point 1 day ahead. Cover and refrigerate. (If you do this, be prepared for a longer baking period, or better yet pull the dish from the refrigerator a bit early to bring to room temp before baking).

DSC_0081Preheat the oven to 350 degrees. Bake the bread pudding uncovered until it puffs in the center and becomes golden brown on top, about 45 minutes. Cut the bread pudding into squares and invert the squares onto plates so that the caramel side is on top. Spoon the remaining caramel sauce from the baking dish over each serving.

Under the broilerPour the creme anglais over each serving. Broil until the creme anglaise begins to brown in spots, about 1 minute. Drizzle the fig compote alongside each serving. Garnish with raspberries and serve. (I mis-read the recipe and placed the bread pudding under the broiler without the creme anglais, then poured the creme before serving .. it was still amazingly delicious!)

Creme AnglaisCreme Anglaise
You’ll find a million uses for this classic dessert sauce beyond this French toast: drizzle it over fresh berries, pair it with a chocolate flourless cake, or even pour it into an ice cream maker and churn it to make homemade vanilla ice cream.

Makes about 4 cups
1/2 cup sugar
10 extra-large egg yolks
2 vanilla beans, split lengthwise
2 cups heavy cream
2 cups whole milk

Combine the sugar and yolks in a large bowl. Scrape the seeds from the vanilla beans into the sugar mixture. Reserve the beans for another use. Whisk the sugar mixture to blend well.

Heat the cream and milk in a heavy medium saucepan over medium heat until small bubbles appear around the edges of the pan. Remove the pan from the stove and whisk half of the milk mixture into the egg mixture in a slow steady stream. Slowly whisk the yolk mixture into the remaining milk mixture in the saucepan. Whisk constantly over medium-low heat until the custard thickens enough to coat a spoon, about 5 minutes (don’t overcook!). Strain the custard through a fine sieve and into a large bowl. Cover and refrigerate.

Do ahead: The creme anglaise can be made 2 days ahead. Keep refrigerated.

Susan Campoy’s recipe calls for a fresh berry coulis to be served alongside the French toast, but since I had a few plump, fresh figs from my friend Nancy’s tree, I decided to make a simple fig compote.

Fig CompoteFresh Fig Compote
Makes 1 cup

1 pound fresh figs
6 tablespoons unsalted butter
6 tablespoons dark brown sugar
6 tablespoons honey
Pinch of kosher salt

FigsCut stem off each fig, slice fig in quarters, and place in medium heavy-bottom saucepan. Add butter, brown sugar, and honey. Simmer until figs are tender, about 10-15 minutes over low heat, stirring frequently, until syrup begins to bubble.

Ruffoni Review

Ruffoni stock potNot everybody can afford an Aston Martin DB9, but when 007 drives one we all seem to have some form of envy, even though you know the bluetooth isn’t going to work, the navigation is gonna suck, and there are no cup holders to be found.  In a way, owning a Ruffoni pot reminds me of this.

Ruffoni stock potSure, the main line of Ruffoni that most of us can afford doesn’t have 2 mm thick copper, but who cares.  When you bring zuppa to the table in one of these babies, even the late Tony Soprano would shed a tear. Every kitchen should have a space for “style first” and “function second” .. and these gorgeous Ruffoni pots certainly have a prominent place in my collection.

Acorn handleWhen Curt and I were planning our kitchen remodel, we left space for the Ruffoni pots on the display shelf as I wouldn’t dream of hanging one on my pot rack! Not only are these pots beautiful, they are a pleasure to cook in.  If I’m making a pedestrian dish, say, chicken noodle soup, the 3 1/2 quart stock pot works perfectly.

I came across a relatively inexpensive 3 1/2 quart Ruffoni on eBay.  It was damaged in that it had a 2 “dimple” dent on the side, and a bent lid. Curt heated up the pot, took a mallet to the dents, and in no time it was ready to go.

Ruffoni - 11Recently we found this beautiful stainless steel braiser on eBay, with aArtichoke handle base made of hammered steel. There’s plenty of room for a LeCreuset and Mauviel to be jealous as they glance across the shelf to see the graceful leaf pulling away from the handle.  It has a fennel bulb for the top handle .. so interesting.

I admit .. I’ve gotten a bit carried away with the Ruffonis but my husband says it’s like having a couple of Sophia Lorens sitting on the counter.  We both appreciate fine beauty, and when it comes to performance, they’re good enough!

Having a copper stock pot is wonderful for dropping the temperature of a chicken stock quickly before it goes into the fridge.  Because the copper is so quick to react, it works perfectly for cooling stock.

Ruffoni - 02If you’d like to add a few of these Ruffoni beauties to your collection, keep an eye out on eBay as there are broke brides looking to sell!

If you can’t tell, I enjoy driving an impractical 470 horsepower-premium-only car and cooking in a drop-dead-gorgeous Ruffoni .. two of my favorite indulgences.

Ruffoni - 04I recently reviewed Baumalu pots.

Cooking With Fire

Pork Recently our friends returned from a trip to Dallas and they brought back a gift that keeps on giving .. an autographed cookbook from a fabulous restaurant they had enjoyed. Do they know me well, or what?!  Entitled Smoke, the cookbook written by Tim Byres is all about new firewood cooking .. how to build flavor with fire on the grill and in the kitchen. I was inspired to take my smoker and grill to new levels, so my husband and I decided to host a potluck Memorial Day BBQ and called the event “Cooking With Fire.”

Our foodie friends can really cook! Joanna, one of Curt’s co-workers arrived early afternoon with her extended family in tow and truck-load of gear. Their family specialty is carnitas, and although I was a bit apprehensive seeing the tubs of Farmer John lard being unloaded, I gotta say those tacos were amazing.

CarnitasThey began by slicing chittlins (pig skin) into strips about 2″ x 6″, then cut pork shoulder roasts into big chunks (about 4″ squares), and placed them into a large copper vat over an outdoor open flame.

To be honest, I’m not sure on the specifics of what actually went into the pot ..

Since Mom Garcia is, what you may say, “height-challenged” we set the propane burner in the stones on the side of the patio.  She tended the pot for at least a couple of hours, tirelessly stirring, stirring.

stirring the pot

There was a recipe for lamb barbacoa tacos in my new Smoke cookbook that I was anxious to try.  I prepared a chile puree to rub on the lamb before it went into the smoker.  It added so much flavor!  Here’s the recipe:

Chile Puree
Ingredients: 1/2 pound dried chiles (ancho, arbol, chipotle, guajillo or pasilla)

To toast chiles:
Toast over a fire or in the oven. If using an oven, preheat to 500 degrees. On a baking sheet spread out a single layer of your choice of chiles. Chiles will puff and become fragrant in 1-2 minutes in the preparing chilesoven. They can burn very quickly, so don’t walk away from the oven. Remove the baking sheet from the oven. When the chiles are cool enough to handle, use kitchen scissors to cut off the stems, then open them to remove the seeds. Use gloves when working with chiles.

To soften chiles:softening the chiles
Place the stemmed, seeded chiles in a medium saucepan. Add enough water (up to 3 cups) so that the chiles float a little, but don’t completely cover or submerge them. Heat the saucepan over a high flame. When the liquid reaches a rolling boil, remove the saucepan from the heat, pour the chiles and all of the liquid into a bowl, seal the bowl with plastic wrap, and set it aside until the chiles have softened, about 1/2 hour. You want the chiles to be almost melting into the liquid.

chile pureeTo puree toasted, softened chiles:
Transfer the softened chiles to a blender, add a little bit of their soaking liquid, then cover and puree to a thick paste, adding more of the soaking liquid if necessary. You are looking for a consistency like ketchup. Be careful: the more soaking liquid you add, the thinner the puree will become. Force the puree through a fine mesh strainer using the back of a rubber spatula. Transfer to an airtight container and refrigerate up to 7 days.

What a spread!To call this barbecue a feast is truly an understatement!  Our guests pulled out all the stops.  We enjoyed …

– EJ’s mac ‘n cheese: 100% unhealthy but delicious (his words, not mine!)
– Bourbon-glazed Rotisserie Pork
– Chris’ renditioCorn on the barbien of Giada’s Farrow Salad with Tomatoes and Herbs (I think she brought this so her uber-healthy husband would have something to eat)
– Luke’s homemade Fire-Roasted Tomato Salsa
– Bob’s Smoked Tri-Tip
– Karen’s version of CPK’s barbecue chicken salad
–  Curt’s famous Chicken on a Throne
– Ron’s amazing deviled eggs
– Bryan & Lynn’s homemade Berry Cobbler and Iced Cream

Beth & Bob

Yes .. it was truly a FEAST and I’m already looking forward to next year!

Italy, part 2

PeperonataTo begin our culinary indulgences that evening, I found a recipe in one of my favorite Italian cookbooks, the award winning “A16 Food + Wine” by Nate Appleman & Shelley Lindgren.  A16 is an acclaimed restaurant in San Francisco, named after the highway that cuts across southern Italy.

Bruschetta with Ricotta and Peperonata
6 bruschette (or a baguette)
1 1/2 cups fresh ricotta, drained if necessary and at room temperature
Kosher salt
2 cups peperonata (recipe to follow)
Extra virgin olive oil

Taste the ricotta.  If it seems bland, mix in a pinch of salt.  Divide the ricotta evenly among the bruschette, and then top with spoonfuls of peperonata.  Note – since I had a lot going on with this dinner, rather than making individual bruschettes, I sliced a baguette in half lengthwise, then cut into lengths that fit in my Calphalon panini press and toasted until golden, then cut into 1 1/2 inch bite-sized strips.  This worked well as a “ricotta and peperonata delivery device!”

Peperonata
Although they are not as sweet as red and yellow bell peppers, Gypsy peppers are perfect for making this bright, versatile condiment, particularly in the late summer when this medium-sized, tapered variety has turned from green to shades of yellow or red.  If you cannot find Gypsy peppers, use a combination of red, orange and yellow bell peppers.  Stay away from green bell peppers as their grassy flavor will overwhelm the more nuanced character of the others.  This recipe makes about 6 cups.

Ingredients
2 1/2 pounds Gypsy or red, orange and yellow bell peppers
1/2 cup extra virgin olive oil
Kosher salt
2 tablespoons capers, soaked and rinsed in water
1 tablespoon tomato paste
1/2 red onion, diced (about 1 cup)
1/2 fennel bulb, cored and diced
1/2 teaspoon dried chile flakes
2 tablespoons red wine vinegar

Roast the peppers: cut off the stems, then cut lengthwise, removing the seeds and membranes.  Pre-heat the broiler.  Press peppers to flatten, then place on a half sheet pan and slide under the broiler.  Broil until skins are charred, then remove from oven and place peppers in a bowl; cover tightly with plastic wrap – this creates steam, which will loosen the skins –  rest until cool enough to handle.  Remove skins (they should slide right off). Tear the peppers into roughly equal pieces about 1/2 inch wide.

PeperonataIn a large pot, heat the 1/2 cup olive oil over medium heat.  Dab the capers dry with a paper towel, and add them to the hot oil.  Fry the capers for about 1 minute, or until they bloom and become crispy.  Stir in the tomato paste and cook for 2 minutes, or until the paste turns from bright red to brick red.  Stir in the onion, fennel, chile flakes, and 1/2 teaspoon salt and cook, stirring occasionally, for about 5 minutes, or until the onion and fennel are tender.

Deglaze the pan with the vinegar, dislodging any browned bits from the pan bottom, and stir in the peppers.  Cook for a few minutes, taste for the seasoning, and adjust with more salt or vinegar if needed.  At this point, the peppers can be served warm or at room temperature.  Or, let cool completely and store in a tightly covered container in the refrigerator for up to 2 weeks.

For our salad course, I decided to keep it simple, and selected another of my favorite recipes from A16, a cucumber salad with fresh ricotta cheese.

Cucumber Salad with Ricotta, Almonds and Bottarga
3 small to medium Persian cucumbers or 1 1/2 English (hothouse) cucumbers
Kosher salt
2 tablespoons extra virgin olive oil
2 teaspoons freshly squeezed lemon juice, or as needed
2 cups fresh ricotta, drained if necessary
1/4 cup whole natural almonds, toasted and coarsley chopped
1-ounce piece bottarga for grating

Slice off a piece of cucumber and taste it.  If the skin is bitter, peel the cucumbers. Otherwise, keep the peel.  Halve the cucumbers lengthwise and remove the seeds with a spoon.  Cut the cucumber halves crosswise. (If you are using an English cucumber, you will need to cut the halves crosswise into 2 or 3 pieces before quartering them.) Quarter each half lengthwise, then cut again into narrow, fingerlike wedges. They should be about 4 inches long. In a bowl, toss the cucumber wedges with 1/4 teaspoon salt, the olive oil, and the lemon juice. Taste for seasoning and add more salt or lemon juice if needed. Set aside.

Taste the ricotta. If it tastes bland, mix in a pinch of salt. Place an equal amount of the ricotta, about 1/3 cup, in the center of 6 plates. Divide the cucumber wedges among the plates, arranging them around the ricotta. Sprinkle the almonds over the ricotta and cucumbers. Using a Microplane or other fine-rasp grater, grate a generous amount of bottarga over each salad. Serve immediately.

During our first trip to Napa Valley, Curt and I were so fortunate to dine at Ad Hoc, one of Thomas Keller’s restaurants. After we polished off our main course, our waiter appeared with a cheese board and this was my first introduction to the idea of serving an after-dinner cheese course. It was such a treat!  So, after our oso bucco plates were cleared, we all enjoyed a few tasty bites of proscuitto from my favorite local Italian market, Claro’s, and some yummy cheeses.

zabaglioneSelecting our dessert course was difficult .. so many delicious options! I came across a recipe on Better Homes & Gardens webpage that sounded amazing, albeit somewhat decadent, and it was decided .. Layered Chocolate Zabaglione Cream Cakes.

There are 3 components to this dessert: chocolate cake, white chocolate cream frosting and white chocolate zabaglione sauce. Curt (my hubby) found a Ruffoni zabaglione pot on eBay that still had the wedding gift tag on it .. I sure like the way the copper causes the eggs to set up properly.

Layered Chocolate Zabaglione Cream Cakes
Makes 12 servings

1/2 cup unsalted butter
3 ounces bittersweet chocolate
6 eggs
1 cup granulated sugar
2 teaspoons vanilla
1/2 teaspoon ground cinnamon
1 cup sifted cake flour
White Chocolate Cream Frosting (recipe below)
White Chocolate Zabaglione Sauce (recipe below)
Fresh berries (optional but makes for a beautiful presentation!)
White and/or bittersweet chocolate curls or shavings

Grease a 15 x 10 x 1-inch baking pan. Line bottom with parchment paper or waxed paper; grease paper and set aside. In a small saucepan combine butter and bittersweet chocolate. Heat and stir over low heat until melted; set aside to cool. Allow eggs to stand at room temperature for 30 minutes.

Preheat oven to 350 degrees. In a large mixing bowl, beat eggs slightly. Add sugar, vanilla, and cinnamon; beat with an electric mixer on high speed for 10 minutes. Sift about one-third of the flour over egg mixture. Gently fold in flour. Repeat sifting and folding in one-third of the flour at a time. Gently fold in melted chocolate mixture. Spread batter in prepared pan.

cakeBake in the preheated oven for 18 to 20 minutes or until a wooden toothpick inserted near the center comes out clean. Cool cake in pan on a wire rack for 10 minutes. Remove cake from pan and peel off paper. Cool cake completely on a wire rack. Cut cake into 24 squares or 2- to 2-1/4-inch circles.

Just before serving, place a cake square or circle on each of the dessert plates. On each cake square or circle, spread about 3 tablespoons White Chocolate Cream Frosting. Top each with a second cake square or circle. Spoon White Chocolate Zabaglione Sauce over cakes, allowing some to flow down sides. If desired, garnish with fresh berries and chocolate curls.

White Chocolate Cream Frosting
3/4 cup whipping cream
1/4 cup powdered sugar
1 tablespoon white chocolate liqueur or clear creme de cacao (found this at Bev Mo)

In a large mixing bowl, beat whipping cream, powdered sugar and liqueur on high speed of an electric mixer until stiff peaks form (tips stand straight). Use immediately.

White Chocolate Zabaglione Sauce
4 egg yolks
1/4 cup white chocolate liqueur or clear creme de cacao
1/4 cup granulated sugar
Dash salt
1/2 cup whipping cream

In the top of a double boiler, beat egg yolks with white chocolate liqueur or clear creme de cacao, sugar and dash salt. Place over boiling water (upper pan shouldn’t touch the water). Beat on medium speed of an electric mixer until mixture nearly triples in volume and temperature reaches 145 degrees, and maintains that temp for 3 1/2 minutes (about 15 minutes total). Remove from heat. Place pan in a larger bowl of ice water and continue beating until zabaglione has cooled.

zabaglioneIn a small bowl, beat 1/2 cup whipping cream on medium speed until soft peaks form (tips curl). By hand, fold about one-fourth of the whipped cream into zabaglione to lighten; fold in remaining whipped cream.

Taking Cam & Lisa to Italy on the “cheap”

I love spending time with long-time friends .. folks that have been in your life for years and years .. just makes for a super fun evening.  Cam & Lisa were coming for dinner, and I decided to pull out “all the stops” and plan a creative menu that included things like ordering venison on-line and making a sorbet for a palate cleanser (I’ll post about this later!).

Venison Osso BuccoCurt ordered venison osso buco from an on-line source, D’Artagnan (they were having a free shipping offer, and we are all about finding a deal!).  Since I hadn’t yet gone out on a limb and made this before, I researched and read all sorts of recipes, but ultimately chose this one from the Madd Hatter’s Kitchen blog:

Venison Osso Buco
Serves 4

2 bay leaves
3 whole cloves
1 sprig fresh rosemary
9 juniper berries
4 venison shanks, cut 3 inches thick
3/4 cup all purpose flour
1/3 cup vegetable oil
1/4 cup extra virgin olive oil
1 1/2 cups finely chopped onion
1/3 cup shredded carrot
1/3 cup finely chopped celery
1 1/2 teaspoons tomato paste
1 can San Marzano tomatoes, crushed
2 cups white wine
7 cups meat stock, preferably beef
1 orange, peel removed in large pieces and juiced
1 lemon, peel removed in large pieces
Sea salt and freshly ground pepper

For gremolata:
1 tablespoon finely chopped Italian parsley
1 plump garlic clove, finely minced
Zest of small lemon, finely shredded

Place the bay leaves, cloves, rosemary, and juniper berries in a piece of cheesecloth and tie.

shanksPlace the venison shanks on a plate, standing on their cut ends. Tie each shank with a piece of kitchen twine tightly around their center, which will keep the meat from falling off the bone as it becomes tender. Trim the ends of the twine if needed. Salt the shanks lightly, with about 1/2 teaspoon of sea salt. Dredge the shanks in flour, covering all sides of the shank thoroughly.

Heat the vegetable oil over medium high heat in a dutch oven. Shaking off the excess flour, place all of the shanks into the hot oil, standing on their cut ends. Brown each side well, 3 to 5 minutes each side. You will do this not only for the cut sides, but around the edges of the shank as well. Once the shanks are thoroughly carmelized, remove them to a fresh plate and drain the vegetable oil from the pot, taking care not to burn yourself and leaving the bits of crust and meat at the bottom.

oso buccoPour the olive oil into the dutch oven, continuing to keep heat at a medium high temperature. Add the onions, and stir them around for 3 to 4 minutes, letting them soften and help release the crusted bits from the bottom of the pot. Add the carrot, celery, the cheesecloth packet of herbs, and 3/4 teaspoon salt. Cook, stirring, until the vegetables are wilted.

Clear a space in the center of the pot, and drop in the tomato paste. Cook the paste for about 1 minute, then stir it into the vegetables. Add the crushed tomatoes and bring to a boil. Raise the heat to high, and add the wine. Cook for 2 more minutes at a boil to burn off the alcohol. Finally, add the stock, citrus zests and juice, and another 1/2 teaspoon sea salt, and bring mixture to a boil.

Cripps Dinner - 07Return the shanks to the pot, coating them with sauce, then standing them on their cut ends. If necessary, add a bit more stock to bring the liquid level back to the top of the shanks. Place the lid on the dutch oven and cook the shanks for 1 hour, reducing the heat so the sauce is at a steady simmer. Turn the shanks about halfway through to ensure the ends don’t dry out.

Uncover the pot and cook for another hour at a steady simmer. This time turn the shanks every 10 to 15 minutes to keep the meat from drying out. After this hour, your shanks should be fork tender and your sauce should be reduced to at least half of what it was at the start.

Pull the shanks out and place on a plate, covering with aluminum foil. Keep warm.

Set a mesh sieve above a saucepan, and strain the sauce, pushing all the thick tomatoes and the cheesecloth packet to extract as much sauce as possible. Return the sauce to the stove to keep warm and adjust seasoning if necessary.

Combine the gremolata ingredients and set aside.

When preparing to make this dish, I checked in with my buddy Ron (who is an excellent chef!) to get his input, and his thought was that that shanks would need 3 hours of cooking time to be fork-tender .. he was right .. two hours just wasn’t enough time.

celery root The Madd Hatter’s blog suggested serving the osso buco over risotto, which would likely be an excellent side, but I went a different direction and served with a potato – celery root mash:

Celery root potato mash

4 medium potatoes, peeled and cut into wedges
1 celery root, peeled and cut into wedges of about the same size as potato
milk
butter
cream cheese
sour cream
kosher salt & freshly ground pepper

Place the potatoes and celery root into a pot, cover with water, sprinkle with salt and bring to a boil on the stove.  Cook until tender, then drain and return to the pot.  Add a bit of butter and cream cheese, and mash with a potato masher.  Stir in some sour cream, salt & pepper.

Yum!  This was so good, even as ugly as a celery root is, I plan to always have one on hand when I make mashed potatoes!

To serve, place the meat standing upright on the plate; mound some potatoes directly adjacent; spoon 2-3 ladles of sauce over the meat & plate; top the venison shank with a sprinkling of gremolata, and voila .. dinner is served!

One final note about the shanks .. Curt has since decided he wants to order the tiny forks so he can retrieve the tasty bone marrow to spread on toast rather than let our Saint Bernard, Bentley, get it all!